Tuesday, September 24, 2013

{DIY} Antiquing Glaze


I go through a LOT of antiquing glaze around this house.
When I first started antiquing furniture pieces I used Valspar's Antiquing Glaze. After running out of glaze half way through a project a few different times I decided that I should make my own. 
And I did.
And it was lovely, so I decided to share with all of you!


Ingredients:
- Clear glazing medium or clear protective finish.
- Brown acrylic paint
- Black acrylic paint
- Copper Metallic paint


I started with one cup of glazing medium.
Then added 1 TBS brown paint.
1TBS black paint.
1TBS copper paint.
Stir.


I roughly painted a piece of MDF with white paint.
I rubbed my glaze on to the MDF. 


This is after one coat of glaze.


And this is after two.


My favorite thing about this glaze is that it can be completely manipulated to produce the look you desire.
  

On the above table I lightly rubbed the glaze on with a piece of an old t-shirt.


I used a brush on this bookshelf to apply more glaze in the corners and lines.
I'm a big fan of this glaze, it produces such a nice color and goes on smoothly. Most of all, I love that I can make as much glaze as I want!


Tuesday, September 17, 2013

Grayson's Closet Re-Do.

A few weeks ago I made one of G's closets into a fun little play area. This time I wanted to revamp a real closet....like for clothes.
It's amazing all the stuff my son has accrued since well, his existence was found out. So that leaves us with lots and lots of STUFF. Some of it we use and some of it is past it's useful time for him. All of this stuff was occupying one of Grayson's many closets (seriously, I want two closets).

Let's take a look at the "before" of the clothing closet.


Notice all the big-people clothes taking up residence in the closet for the moment.


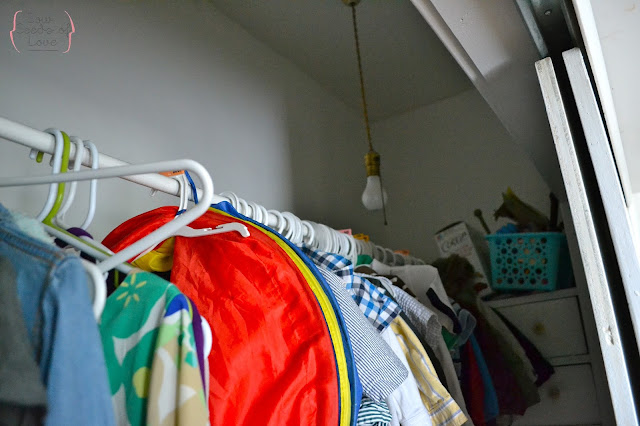
I didn't get a stellar shot of the doors but you can see them a little bit in this picture above. they are on a by-pass door track but they are just painted pieces of plywood.


Once the closet was cleaned, gutted, patched, primed and painted a bright white we were in business.
Although the built in drawers may have looked convenient. They kind of freaked me out-potential spider city! So they had to go!  


I purchased this closet tower at Menards. It was simple to put together and anchor to the wall. (Sorry about the blurred picture, I was holding a squirmy, sleepy baby while snapping a few pictures).


I wanted to put a little something unusual in the closet. This chevron/herringbone hybrid stencil was perfect. I wanted to use the comet dust color that I had used here and here however it is very subtle and I worried it would not contrast enough against the white, so I added a bit of pale blue craft paint and voila!! Perfect shade!


Speaking of perfect shades, I picked up this shade at Lowes. It came on a little lamp that was on clearance for $4 so I bought the whole thing just for the cute little shade.


I added some utility hooks (the kind made for ladders and tools) on the "gear" side of the closet. I spray painted them a lovely shade of green that coordinates with the green wall in G's play closet.


I know it's not great photography etiquette, but for the sake of actually being able to see inside the closet I needed to use it's interior light, 
so you can feel free to ignore the huge bright spot staring back at you ;)
The one thing I absolutely needed in this closet was a place to put G's stroller. The utility hooks are AWESOME, I can hang up all of his gear that takes up floor space.


I was able to snag some Sterilite containers on sale which I used to separate too small clothes and label them with chalkboard labels. 


These doors are special order from Lowes. It will take about two weeks to get them in But they are almost identical to the original doors in the rest of the house. I'm ecstatic that Grayson'e closet will have double doors that both open, it will be so much more roomy and convenient for moving things in and out. I guess the closet will be open for the world to see until our doors come in, good thing Grayson has one good looking closet!


Saturday, September 14, 2013

Living Room Updates & Turning a Flush Mount fixture into a Pendant.

We are lucky to have two decent sized living-room-ish spaces on the first floor of our home. One of them serves as our everyday living space and is adjacent to our dining room and the second is separated from the first with french doors. So it's a quieter little space and is really bright and lovely in the day time. 
I'm currently in the process of painting all the trim in that room white, french doors OY VEY! One of my biggest issues as a decorator is that when I have a really good space, or a really neat vignette in a room I totally blank. I hit a wall and it really takes me a while to top the greatness and put together the rest of the room. Give me a problem room, and I have a plan! Give me a bright sunny perfect sized space with great accessories and I fall apart and it takes me a whole month to put it together. 


So this is where I am. This cute dusty sage distressed book case with a white lamp, gold mirror and terrariums. Creating vignettes is kind of difficult for me. It really takes a while, I have to switch things around about five times, look at it for about ten minutes, move something to the left a smidge and then I'm in the sweet spot.


But now as I gather myself and try to figure out how exactly I plan on pulling the rest of the room together I knew that our drab little light fixture needed an update.


As always I'm the queen of NOT getting the initial "Before" shot in here. So pretend with me, this is a generic flush mount light. I call them boob lights you can see the exact model in this post from our hallway. I took down our sad little light and gave him a new paint job.


After he was all painted up and matched my ceiling, I rehung this fella and used a few washers and nut to hang the pendant on the threaded tube from the original fixture.


I layered two washers to make sure the pendant couldn't slip off the threaded tube.


And Voila my sweet new pendant. It's from Urban Outfitters and I'm so glad I bought it when I did! I planned on linking it to my post however they are sold out and the shades are no longer available. 
Looks like I bought just in time!

Linking up at : Commona-my house


Sunday, September 8, 2013

Flaxseed Crackers & Cucumber Sandwiches.


I am a huge fan of cucumber sandwiches!
In fact when I was in middle school I had my tonsils taken out and I was SO afraid to eat for a few days, but the first thing I did eat was a cucumber sandwich.
A sweet friend of mine recently mentioned that you can make cucumber sandwiches with flaxseed crackers. 
I knew I had to try some for myself, and here is a great recipe I found for garlic parmesan flaxseed crackers. 


1 cup flax seed meal

1/3 cup Parmesan cheese, grated

1 teaspoon garlic powder

1 teaspoon salt
1/2 cup water

Heat oven to 400 F.

{1} Mix all ingredients together.


{2} Spoon onto sheet pan, I lined mine with tinfoil. 


{3} Cover the mixture with a piece of tinfoil,waxed paper, etc. Even out the mixture to about 1/8 inch. I used a rolling pin. It's important not to let it be too thin around the edges or that part will overcook before the center firms up. So after you spread it out, remove the paper and go around the edges with your finger and push the thin parts toward the center. I then used a pizza cutter to score the cracker dough into squares, this will make it easier to break when it is finished baking.


{4} Bake until the center is no longer soft, about 20 minutes. If the crackers start to burn around the edges, remove from them from the oven and let the crackers cool completely - they will continue to crisp up.


{5} Break into pieces.


The crackers were so yummy and totally compatible with a clean eating diet. To make my beloved cucumber sandwiches I mixed 1 TBS of cream cheese with 2 TBS Greek yogurt (to lighten up the cream cheese) . 

Topped my crackers with my lite cream cheese and a cucumber slice.

Happy snacking!