Saturday, June 2, 2012

DIY-My-Dishwasher

SO, A FEW WEEKS AGO I DISCOVERED THAT THE DISHES WERE GROSS..........
I guess I just had other things on my mind all that other times I was unloading the dishwasher because I know that cloudy look to our glasses and the almost tarnished looking silverware hadn't JUST appeared there. So I immediately began to try and discover the cause.....
I thought I was doing most things right, I pre-washed, I even talked to my sweet hubby about pre-washing the dishes, because he is very nice and likes to load and unload the dishwasher for me a lot :)
We were using the cascade complete gel with bleach, which I though was the good stuff....or maybe I'm just a sucker for advertising. Anyway, we were paying like we were using the good stuff and it was making our dishes look NASTY.
I emailed our land-lady to ask her if this was an issue when they lived in the house or if maybe the washer needed to be serviced, she said it had always been that way but if I used a finishing agent it would probably reduce some of the cloudiness. Well, people Jetdry isn't cheap and it comes in a small bottle and I really didn't want to pay a whole lot for a tiny chance that it would PROBABLY make my dishes look cleaner so I turned to the internet and read all about what people were saying about DIY dish detergent.
I make my own laundry detergent and use it in a HE front-loading washer and it works great so I really wasn't scared about putting homemade remedies in my dishwasher. 
I came across a recipe for homemade dish detergent here and it was....ALRIGHT. It cut down the cloudiness but not a whole lot so I read some more, tweaked my approach and achieved perfection.
IT'S ALL IN THE INGREDIENTS...
              •  1 cup Borax
              •  1 cup Washing Soda
              •  1/2 cup Kosher Salt
              •  1/2 cup Citric Acid 

All these ingredients are super easy to find anywhere, so that was fabulous. I was a little worried about the citric acid but that was really easy too, they will have it at any Walmart or grocery store in the canning supplies.
So you will want to put all those ingredients in a bowl and whisk them together....
NOW, HERE'S WHERE I MADE MY MISTAKE
When you whisk all the ingredients together you get this nice little powdery mixture, DON"T ASSUME YOU'RE DONE!!
My first attempt at this stuff I just put the mixture in a container and when I woke up the next morning and did my dishes, this is what I found...
It pretty much looked like huge clumps of feta cheese, but it does not crumble so easily. some of the rocks it made were HUGE and would just be unusable because it seemed that the different ingredients had found itself and only adhered to particles like it.
SO I WENT BACK TO THE INTERNET...
Turns out citric acid will make the mixture separate and clump, NO GOOD. However you can always breakout your trusty food processor to help break down all those little clumps into a nice powder once again, so I did. 
I MADE A SECOND BATCH, 
and added the broken down, older batch too it in a mixing bowl. I read that if you make a batch, leave it out on your counter in a bowl for a day or two after you make it, whisking it periodically it will maintain a powdery form and then you can store it in a container without it clumping.
SUCCESS!
I left the mixture out for three days before containing it. The morning of day two the mixture seemed kind of sticky, like the powder was slightly wet (BUT IT WASN'T). I just whisked it back into a powder and let it sit for another day and a half and it was good to go, NO MORE STICKING.
NOW FOR A BIG FINISH.
For my first try with homemade dish detergent I was doing the 1/2 cup vinegar mixed with three drops dish soap and just pouring it in the bottom of the washer with the 1TBS of detergent, like I said before this wasn't giving me the results I wanted. Thanks to research I now pour vinegar into the rinse agent dispenser and make sure it stays full. I still pour 1 TBS of the detergent in the bottom of the washer and then the washer releases the vinegar when it's doing it's thang.
SO HERE'S MY RESULT!
The little spoon is the old recipe, it's not TERRIBLE, but it's nothing compared to the nice shiny spoons I now have (Big spoon).

Wednesday, May 16, 2012

The Hall of Awkward.

We have the most awkward hallway, it is some sort of lopsided triangular shape. it has no closet or storage area, which you might hope to have in a hallway and the lighting isn't exactly the greatest either. The lighting isn't too bad in the day time when light from the dining room window spills over into the hall, but the only light provided at night comes from one single wall sconce, but the wall paper and paint treatment on the doors and molding, suck up the light like a big ugly black hole.


This is the view from the bathroom. You can feel free to ignore our crazytown dining/livingroom on the right.
Take a gander at that long angular corner that our bathroom door is tucked in. And there it is people, the sconce of all sconces. Actually it's really not all that bad, the sconce is set on a dimmer so it has four settings. 
Check out that paint treatment! Classy? No! I don't think I've seen anything worse than fake wood grain painted in brown high gloss paint. Clearly I had my work cut out for me. Peeling down that fabulous green marbled wallpaper was first on my list. The wallpaper was so old that it basically disintegrated before my eyes, which actually moved the process along quite well. Due to some wall structure issues I did have to patch up a few things in the wall but that too moved along quite well. Next on my list was priming and painting. I decided I wanted to go with Frozen Vanilla from Better Homes and Gardens for the walls and white for the trim and doors. 
I knew that I wanted to bring gold accents out into the hallway since it's used heavily used in our bathroom, and the gold wall sconce would tie in pretty well. I love navy, coral and gold together and the subdued wall color allowed me to use such a bold color combo in the hall.

Like I mentioned before we have no hall closet or linen closet, so we were in need of a little somethin' somethin' to store extra towels, toilet paper and etc. I found that delightful campaign dresser at goodwill and painted it up all snazzy in Rich Navy by Glidden  to bring some brilliant color into the space, topped off with a cream and gold tray, a gold picture frame and pink roses.


Go ahead and take a good long look at that gold wall sconce accompanied by all those great dollar tree picture frames I spray painted gold. I filled them with black and white photos and fun blue, coral and cream prints. I eventually intend to fill the entire wall with prints, black and white photos and mirrors, so I'll be scouring yard sales and thrift shops to find great mis-matched frames to decorate our wall.
Across the hall, from the collage wall, I spray painted two mirrors I had on hand and made a print for the long frame that takes up just enough wall space to give the hall life without being over crowded. Soon I hope to get some pictures in of the bathroom, I just need to add a few finishing touches first ;)

Tuesday, April 10, 2012

Nursery Idea Board.

Good Morning! I don't know about you but around here we've had some pretty early mornings as of late but that is probably a good thing seeing as how the days are beginning to fly by until the arrival of baby, I start some classes, family comes to visit and we ourselves will be heading out of town and there is still much work to be done in our little house before all of these things take place. The home improvements are sailing along quite nicely and we are getting really excited for the culminating project, the nursery! 
I decided to work on this lastly since he shouldn't be here demanding attention until late-ish June and the majority of our home is in immediate desperate need of some TLC. Although it will be a while before I get started I've made a little idea board to share with everyone the projected vision for the nursery and to remind myself not to forget any of the really awesome details.

This is the fabric that started it all. We had a big baby/stroller blanket made out of this fabric for us and I just love it. When our boy is big enough to sleep with actual blankets and things I might get a little duvet cover made from it, until then though it will be folded over the side of his crib and used for snuggling our sweet baby. My favorite part of the fabric was the little gray birch trees, I love the color gray in nurseries and I was so excited that the fabric incorporated gray with orange and blue.


I like this warm gray for the walls, it's the same gray that is in the birch trees and it will allow us to use gray in a huge area without it feeling too cold.
This is a picture of the EXACT same dresser that we found on craigslist for 45$, which is a steal!!!! I don't know if you've ever priced these dressers but if you want to shock yourself just google mid-century modern dressers one day. I'm going to paint just the outside of the dresser except for the drawers so the end result will be something like this(left) but in frozen vanilla(right) instead of green.


The fabulous thing about this dresser is that it's size will allow us to use it as a dresser and a changing table!
This brings us to our fabulous crib that my husbands parents bought for us. I think it's really great and classic with it's wide square rails.


I found this fabric in the same collection as the baby blanket fabric and it coordinates perfectly with our little guy's blanket. when the crib gets here and I can take all the proper measurements I'm going to order some of this pumpkin orange fabric and make a bed skirt for his crib. Because of all the safety precautions we must take with baby's they don't seem to have very comfy or cute things in their cribs, but a colorful bedskirt is a perfect way to add color safely. 
A few months ago before we ever left Virginia we paid one last visit to Ikea ( sigh ) to pick up this great rug for the nursery for only $19.00! It totally matches the birch trees in the blanket fabric, they look just like a stylized drawing of trees with lines, just like this rug and since we have all wood floors it's a great way to cut down on noise and soften our baby's room.
My Mamaw's very orange chair has finally found it's place. It's going to tie in great with the color scheme and I'm glad the nursery will have a comfy place to sit since I feel I may be spending lots of time in that room.


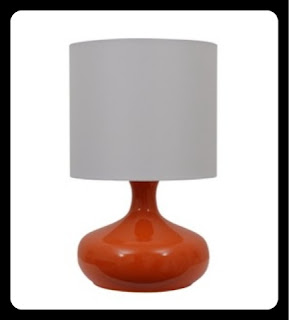
Accessories! I love accessories. This target lamp will be a great addition to the top of the dresser. I'm thinking that this vintage egg basket I found at a local antique store will be perfect on the floor beside the arm chair to hold stuffed animals (the basket doesn't look it in the picture but it's pretty huge!) And this ceramic garden owl will look phenomenal in a pair to use as book ends on a shelf.
These little guys are two more accessories that I'm hoping will add some accent colors from the blanket into the room. The cute toadstool clock is going up on the wall over the dresser along with a few other items and pictures and the little yellow fox will sit snuggly in the orange chair.


These are some great 11x14 posters that I came across on Etsy. I may buy a few of these or create my own to hang on the wall over the dresser to add some color and fun art to the walls. 

That's all I have for now, I'm sure I'll come up with more and I will be sure to post pictures as the room get complete, I hope you enjoyed this for now!


Wednesday, April 4, 2012

Color Theory.

I love ironic color schemes! What I mean by this is colors that you wouldn't normally put together, colors that aren't traditionally grouped together and labeled as "matching", but when you pair them they perfectly compliment each other's uniqueness. I see this a lot in J. Crew catalogs and it inspires me. One of my favorite ironic color combos is aqua and orange, so I was completely thrilled when we moved into our new house and our laundry room was painted a very pale aqua.


I repainted all the white trim and the door to freshen up the room and put down a tan grass rug that we had and a shoe rack just inside the door. In our neighborhood all the parking is behind the houses so we always use this back door, this made our rug and shoe rack a necessity. I made curtains from black and white chevron fabric. I searched for curtains like these on the internet but found the fabric here and it was much more economical to make the curtains myself than to buy the curtains pre-made.                                                                                   


The white shelves were up when we moved in and the black fabric baskets we previously owned that hold all our cleaning and laundry supplies and we added a jar to store laundry detergent in. I used remaining fabric from the curtains to cover our ironing board. 

I hung up black hooks in different locations around the room to hang up brooms/steam mops/Chewie's leash etc. The orange laundry basket is a find from our local hardware store, I love the way it looks against the aqua wall. The window is a window into our pantry which is really great for letting natural light into our pantry. I want to find other ways to incorporate orange into the laundry room. Do you use any ironic color schemes in your home? What are your favorite nontraditional color schemes?

Monday, April 2, 2012

A Classy Faker.

I've taken about a month and a half long hiatus from blogging anything in order to move in to our new home and to start making it livable. Hopefully soon I can put the finishing touches on the living room, laundry room, kitchen and bathroom and  put up before and after pictures of those rooms in our little abode. 
In the past few days I've been finishing the bathroom, Alex and I put up a pendant light in the bathroom  but for about a week it has just been a bare bulb with no shade. I had been wanting something classy and glassy to compliment the glass drawer pulls and fancy gold molding in the bathroom. I wanted something like this.........


But my budget does not allow for a $300 Lamp, so I decided to get crafty and create my own classy glassy chandelier. Here's how...


1. Gathering supplies, you'll need a hot glue gun and glue sticks, two metal rings of different sizes(your choice of size dependent upon how big you want your chandelier), fishing line, bead garland(make sure you have plenty I had 90 ft and used every bit of it) which I purchased here. You may also want a measuring tape or a ruler unless you just want to eyeball it.

2. Attach the end of your bead strand to the metal ring using your fishing line to secure it tightly.
3. Cut a long piece of fishing line, secure the end of the line around the metal ring and the bead strand and begin to wrap the fishing line around the beaded strand and the metal ring. continue this around the whole ring. when the ring has ben completely wrapped, cut the bead strand and secure the bead strand to the ring with the fishing line.

4.Cut another piece of fishing line and wrap just like before, except in the opposite direction and tie off at the end.

5. This should be your result. Repeat steps 2-4 one the remaining metal ring.

6. Decide how long you would like your dangling strands on the larger/outer ring to be. I chose 1ft. Now cut lots of strands the same size.

7. Use your glue gun to glue the first bead of each strand to a bead around the perimeter of the metal ring. Continue to glue a new strand to each bead until you've completed the the full circle.

8. This should be your result. 
9. Now move on to your smaller/inner ring. depending on how full you want your inner ring to be you can glue the strands on each bead of the ring perimeter or every-other bead.
10. Place the rings inside one another. Decide how far down you want your inner ring to hang. I chose 6in since my dangling strands were all 1ft. I then cut 3 pieces of fishing line about 9in long to give myself room to tie the ends. Tie one end of the line to the larger ring and the other end to the smaller ring making sure that there is 6in of line between the two rings. Repeat this step on two more locations of the rings making sure they are equal distances apart.
11. Combine four pieces of fishing line, each about two feet, fold in the center and make a knot just above the loop. Make two more of these.

12. Wrap one group of the line around the larger metal ring and pull the end of the group through the loop end. do this at two more locations on the largest ring, once again all equidistant. 
13. Gather the three groups of the fishing line in the center and tie them in a knot making sure that the shade will hang level. Use the excess fishing line to attach the shade to your hanging pendant or to the top of your lamp.
Voila! This is what I ended up with and I love it! I'm playing around with the idea of adding some bigger beads to the ends of the strands to add some interest to the shade, if I do I'll post pictures.

Tuesday, February 7, 2012

eBay Made Easy

The early spring is the best time to get rid of stuff that I don't need/want anymore. For me the extra weight is clothes. I buy a lot of clothes, especially during a sale. When I was in college I lived near a J. Crew factory warehouse, every month there was a warehouse sale and everything was cheap cheap cheap. They would give you a trash bag and a price list, you would wait in line to get into the warehouse and it seriously could take up to an hour. The wait was totally worth it! Pants and dresses priced at 10$ and shirts at 5$ and wedding dresses 50$. There weren't any dressing rooms so sometimes I would get a few items that were too big, too small but most of the time I was very happy with my purchases and got to enjoy them so much!
So, what do I do with the items that don't fit or I've worn for a while but I want something new? They get sold! Especially now while my tummy is getting bigger I won't be able to wear any of my shirts from last spring and summer, so what better time to trade them in for something new? There are now lots of ways to sell clothes you don't want anymore... Plato's closet, eBay, craigslist, but the one you should pick really depends one what you're trying to sell and how much are you looking to get for it?
Plato's Closet: Plato's is a thrift store that will buy your gently used clothing and accessories and they resale them. Plato's is great for your regular mall brand stores like American Eagle, Gap, Aeropostale etc. These are brands that exist in most malls and are less expensive, you wouldn't get as much money back on your sale if you tried to sell on eBay.
Craigslist: Personally I've never sold anything on craigslist, but I've bought plenty! I only have experience buying furniture and baby gear items from craigslist. Craigslist is great for these larger items which really seem to be the most popular items to buy and sell on Craigslist because the sale is localized and you wouldn't ever have to pay shipping.
eBay: I have made so much money in the past selling clothing on eBay. People sell all kinds of items on eBay but I think the bigger items are doing better on Craigslist because the seller won't have to front money for shipping and sellers won't be deterred by a high shipping price.
The secret to my success: I have a few rules to selling on eBay that I like to stick to.
1. If I'm going to sell an item on eBay, I make sure it is a more expensive brand. People who are looking to buy on eBay are looking for high-end products that don't look worn for a less expensive price-tag.
2. Your item pictures need to be classy. When you take the pictures it should be in a clean well lit area. I usually try to hang the clothing on a nice wooden hanger on a clear tack or a small nail against a plain wall. This gives a buyer a really good sense of what the item looks like and it looks a lot more professional and that definitely appeals to people.
3. How to price your items is really important. You really really don't want to set your starting bid of the auction too high because that will detract from interest in the item. A buyer will look at a highly priced item and say to themselves "I really like that, but it's already priced pretty high and there are 3 people 'watching' that item and if they bid on it, it will be out of my price range". Also don't low ball yourself and start at zero. The minimum I start with is 5$.
4. Advertising is key! The way you list your item will really affect your success. ALWAYS put the brand of the item and a very short description of the style and condition in the listing title. For example: J. Crew ruffle tank- NW/OT. Translation: J.Crew tank with ruffles, new without tags.
This really tells people the most about your item without the title being long or looking cluttered. You should put up at least one picture. I usually do just one if the item has the same front an back however if there is an interesting sleeve detail or special design on the back pockets of jeans having another picture showcase those features is important. The description is really where you need to draw the buyer in, here you should tell about the item, if you never wore it or if it is a little more gently loved. You should talk about the material, is it breathable? Does it keep you warm? And lastly give suggestions about what to pair the item with. Sometimes people will pass over an item because they don't know if it is really their style or if they have anything to wear it with, this is where you can inspire them and convince them that they cannot live without the item.
5. Shipping can be a challenge but don't make it any harder than it has to be. My favorite way to ship is the good 'ol postal service. For shirts thinner sweaters and mini skirts I usually just get a padded 2$ envelope from Walmart and if the item is light you shouldn't have to pay anything for shipping. For other items I pick up the flat rate envelope from the post office and ship in that. As far as charging for shipping I think about what I'm sending. If I'm going to be sending a tank I'll go for the padded envelope and charge around 5$ shipping which generally will be around 3$ in profit from shipping alone. If I'm going to be sending a little bit heavier of an item I stick with the flat rate envelope and charge a 10$ shipping fee which usually brings in a 5$ profit.
I hope all these eBay sales tips were helpful!